

No-Bake Christmas Cheesecake Balls (Easy Holiday Truffles)

If your Christmas cookie tray needs something new, these No-Bake Christmas Cheesecake Balls are it. Crushed vanilla wafers and cream cheese roll into creamy little truffles, then get a white chocolate coat, a red and green drizzle, and a shower of sprinkles. No oven. No fuss. Just a festive treat that looks like it came from a candy shop.

If you’ve ever made Oreo balls, you already know how this works. This version swaps the chocolate cookies for vanilla wafers, so every bite tastes like a sweet little cheesecake with a crisp candy shell. They’re a natural fit next to the fudge, peanut brittle, and Christmas crack that show up on so many Southern holiday tables.
What You’ll Love About This Recipe
- No Baking Required: Your oven stays free for the ham, the rolls, and everything else on the holiday menu.
- Simple Ingredients: Vanilla wafers, cream cheese, powdered sugar, vanilla, white chocolate, and sprinkles, plus a tiny splash of lemon for real cheesecake flavor.
- Make-Ahead Friendly: They keep in the fridge for days and freeze beautifully, so you can get a jump on holiday baking.
- Perfect for Gifting: Tuck a few into a holiday tin or a cellophane bag for neighbors, teachers, and cookie swaps.
- Kid-Friendly Fun: Little hands love rolling the balls and adding sprinkles.
Ingredients
You only need a handful of grocery store staples:
- Vanilla wafers: About 10½ ounces, which is most of an 11-ounce box of Nilla Wafers. Golden Oreos work too.
- Cream cheese: One 8-ounce block, softened. Full-fat gives the creamiest, firmest centers.
- Powdered sugar: Sweetens the filling and dissolves smoothly into the cream cheese.
- Vanilla extract: Rounds out the flavor of the wafers.
- Lemon extract: Just ⅛ teaspoon gives a hint of that classic cheesecake tang without tasting lemony.
- White chocolate: 10 ounces, chopped. Baking bars melt smoother than chips. Vanilla almond bark is a budget-friendly swap.
- Oil-based food coloring: Red and green, labeled for candy or chocolate.
- Christmas sprinkles: Any festive mix you like.
How to Make Christmas Cheesecake Balls
- Crush the cookies. Pulse the vanilla wafers in a food processor until you have fine crumbs. No food processor? Seal them in a zip-top bag and crush them with a rolling pin.
- Make the cheesecake filling. In a large bowl, beat the softened cream cheese, powdered sugar, vanilla, and lemon extract with a hand mixer until smooth and creamy. Mixing the flavorings into the cream cheese first spreads that tiny bit of lemon evenly through the whole batch.
- Add the crumbs. Stir in the cookie crumbs a little at a time until the dough holds together when you squeeze it. You may not need every last crumb.
- Roll and chill. Scoop the dough into about 20 equal portions, about 1½ tablespoons each, and roll them into smooth balls. Set them on a parchment-lined baking sheet and chill for 30 minutes, until firm.
- Melt the chocolate. Microwave the white chocolate at 50% power in 30-second bursts, stirring between each, until smooth. Spoon about 3 tablespoons each into two small bowls and tint one red and one green. Keep the rest white for dipping.
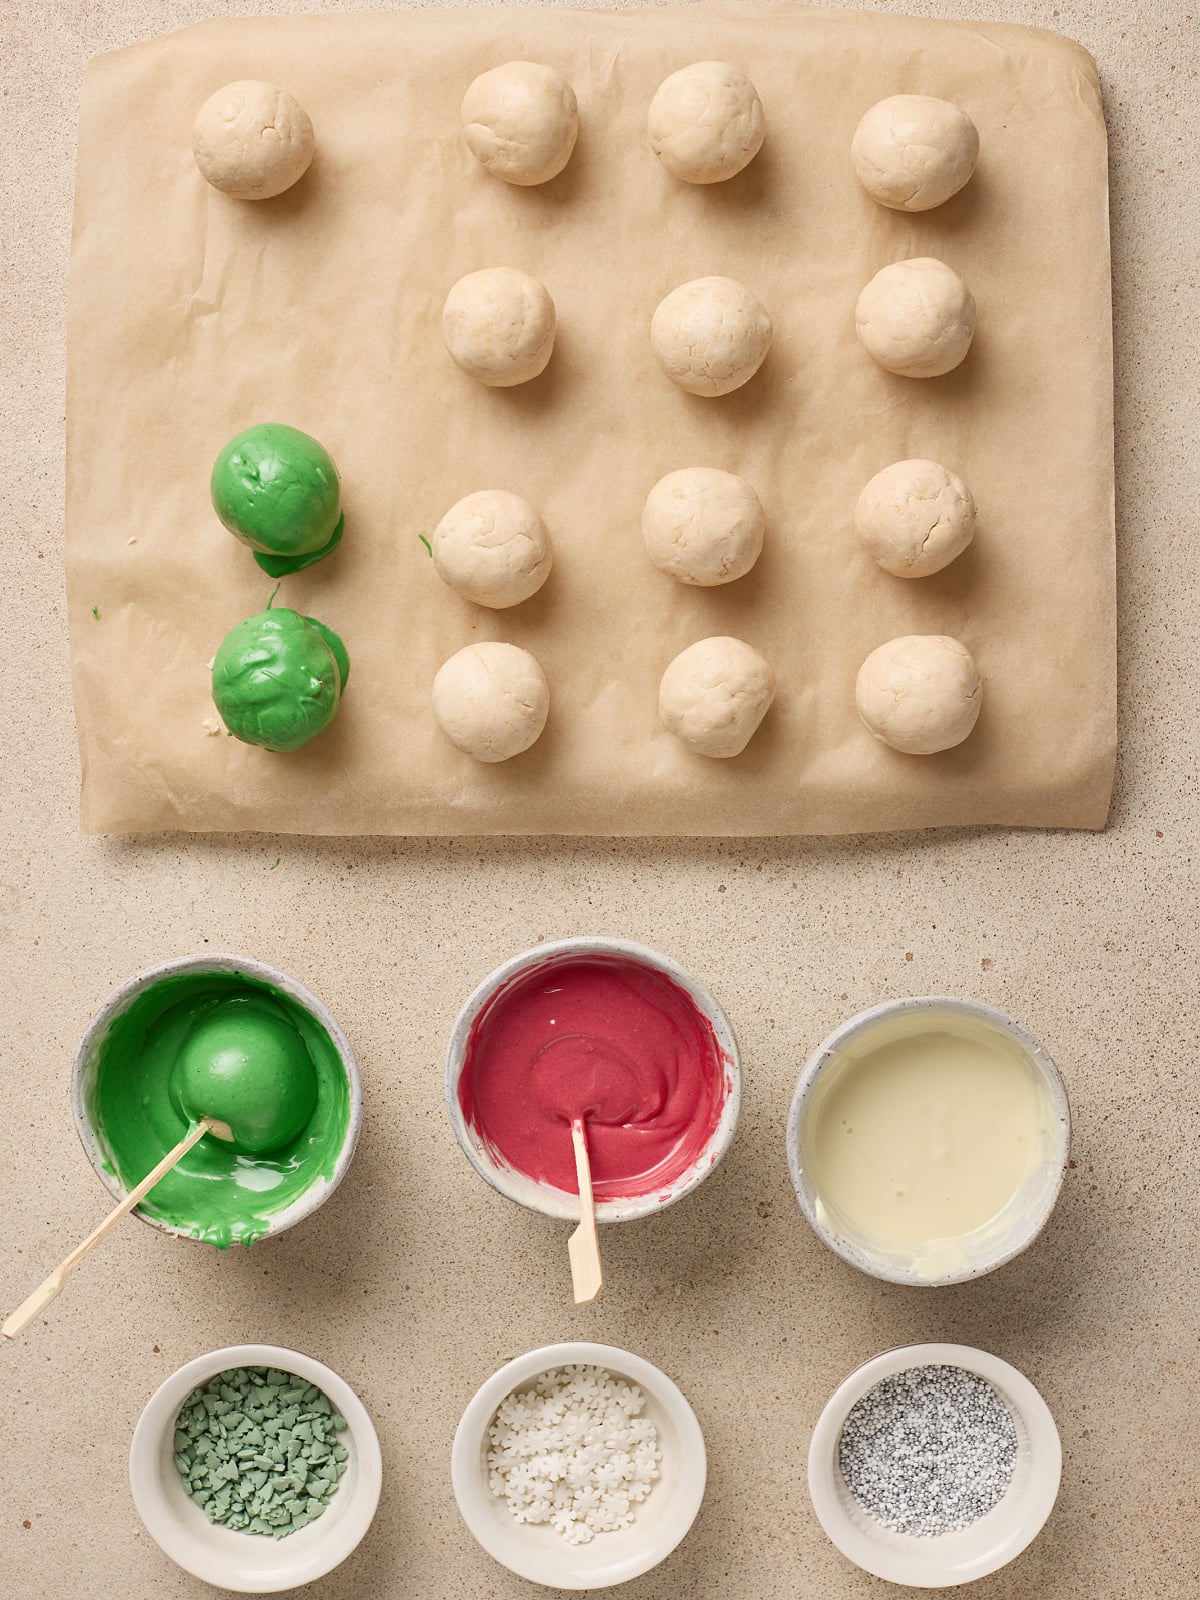
- Dip the balls. Drop one cold ball at a time into the white chocolate and roll it with a fork until coated. Lift it out, tap off the extra, and slide it back onto the parchment.
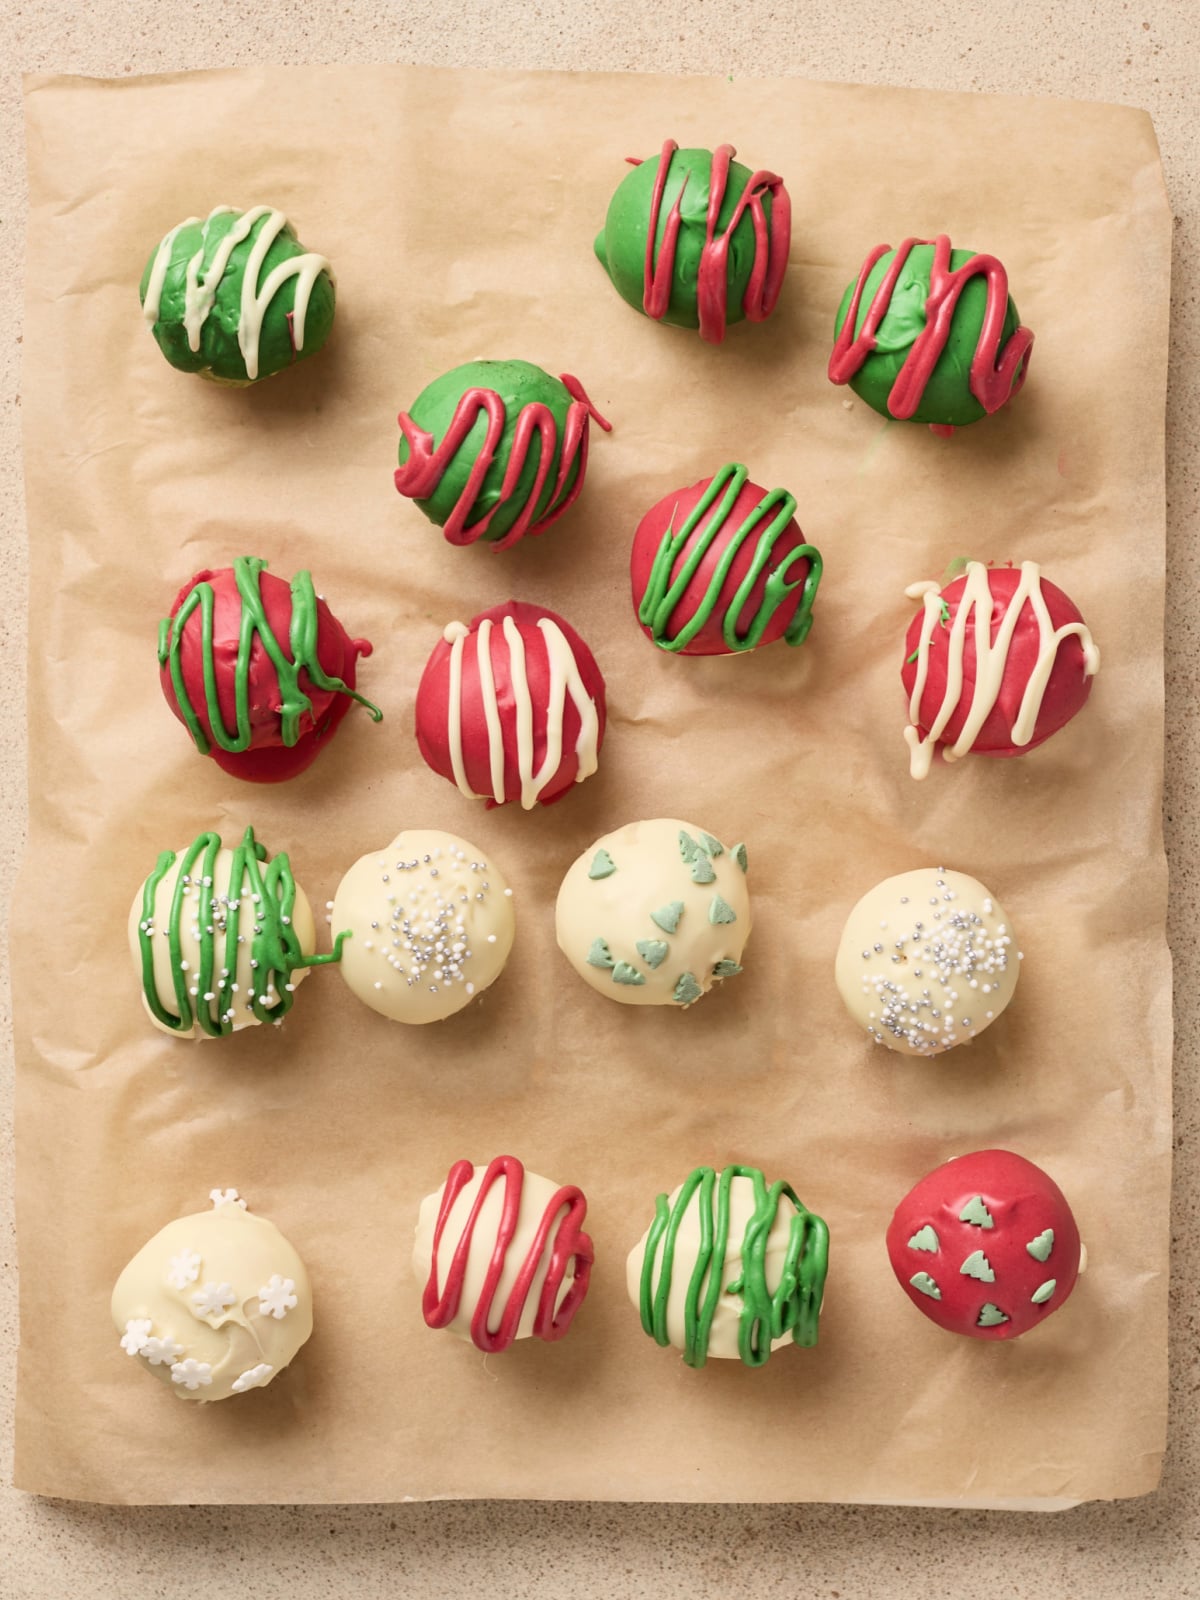
- Drizzle and decorate. Once a few balls are dipped and the coating starts to set, drizzle on the red and green chocolate. Add sprinkles right away, while the drizzle is still wet.
- Chill to set. Refrigerate for 15 minutes, until the coating is completely firm.
Tips for Perfect Cheesecake Balls
- Flavor the cream cheese first: Extracts are hard to spread through dry crumbs. Beating them into the cream cheese first means every bite gets the same hint of lemon.
- Go easy on the lemon: Lemon extract is strong. Start with ⅛ teaspoon (half of a ¼ teaspoon if you don’t have the smaller spoon), taste the filling, and add a drop more only if you want it.
- Use oil-based coloring: Regular liquid or gel food coloring has water in it, which can make melted chocolate seize up and turn grainy.
- Keep the balls cold: Work with a few at a time and leave the rest in the fridge. Cold centers hold their round shape and help the coating set faster.
- Don’t overheat the chocolate: White chocolate scorches easily. Low power and short bursts are your friend.
- Drizzle like a pro: Spoon the colored chocolate into a small zip-top bag, snip a tiny corner, and zigzag it over the balls.
- Rewarm as needed: If the chocolate thickens while you dip, give it another 10 to 15 seconds in the microwave.

No-Bake Christmas Cheesecake Balls
Ingredients
Method
- Pulse the vanilla wafers in a food processor until finely crushed.
- In a large bowl, beat the cream cheese, powdered sugar, vanilla, and lemon extract until smooth.
- Stir in the crumbs a little at a time until the dough holds together when squeezed.
- Roll into about 20 balls, about 1½ tablespoons each. Chill on a parchment-lined baking sheet for 30 minutes.
- Microwave the white chocolate at 50% power in 30-second bursts, stirring between each, until smooth. Tint about 3 tablespoons red and 3 tablespoons green.
- Dip each ball in the white chocolate, tap off the excess, and set on parchment.
- Drizzle with red and green chocolate and add sprinkles while the drizzle is wet.
- Refrigerate for 15 minutes, until set.
Nutrition
Notes
- Lemon extract is strong. Start with ⅛ teaspoon and taste before adding more. For a fresher flavor, use 1 teaspoon finely grated lemon zest instead.
- Use oil-based (candy) food coloring so the chocolate doesn’t seize.
- Vanilla almond bark or white candy melts can replace the white chocolate.
- Store in the refrigerator for up to 5 days or freeze for up to 2 months.
- Nutrition information is an estimate and will vary based on the brands used. It is calculated per bite and does not include the food coloring or sprinkles.
Tried this recipe?
Let us know how it was!Notes
- Use oil-based (candy) food coloring so the chocolate doesn’t seize.
- Vanilla almond bark or white candy melts can replace the white chocolate.
- Store in the refrigerator for up to 5 days or freeze for up to 2 months.
Variations and Substitutions
- Swap the cookies: Golden Oreos, shortbread, or gingersnaps all work. Chocolate Oreos make a classic Oreo ball.
- Peppermint twist: Skip the lemon and add ¼ teaspoon peppermint extract to the filling and top with crushed candy canes.
- Almond bark coating: Vanilla almond bark or white candy melts are cheaper and set up quickly.
- Change the colors: Make them for any holiday. Try pastels for Easter or red and blue for the Fourth of July.
Storage
- Refrigerator: Store in an airtight container in the fridge for up to 5 days. Because of the cream cheese, don’t leave them out for more than 2 hours.
- Freezer: Freeze in a single layer, then move to a freezer-safe container for up to 2 months. Thaw overnight in the refrigerator before serving.

FAQs
Are these the same as Oreo balls?
They’re close cousins. Both are cookie crumbs mixed with cream cheese and dipped in chocolate. This version uses vanilla wafers for a lighter, cheesecake-like flavor.
Why did my chocolate turn thick and grainy?
It either got too hot or picked up a little water. Melt it low and slow, and use oil-based coloring only.
Can I make these ahead of time?
Yes. Make them up to 5 days ahead and keep them in the fridge, or freeze them for up to 2 months.
Do I need a food processor?
No. Crush the cookies in a zip-top bag with a rolling pin. A hand mixer or a sturdy spoon works for the cream cheese filling.
Looking for more no-bake holiday treats? Try my No-Bake Peppermint Cookies or Christmas Oreos. If you love little cheesecake treats any time of year, my Crustless Cheesecake Bites are a reader favorite. For even more ideas, check out The Ultimate Christmas Cookie Roundup.
Last Bite
Did you make these No-Bake Christmas Cheesecake Balls? I’d love to hear how they turned out! Drop a comment below, snap a picture, and tag @southernkissedblog when you share it on social media. And don’t forget to pin this recipe so it’s ready when holiday baking season rolls around!
